Profile and Page settings
Whether it is a portfolio or an online shop, you can tailor your profile page to suit your needs.
How to create your profile page
In the Account menu you will find the Profile and page settings section. Here you will find all the tools you need to create and customize your profile page.

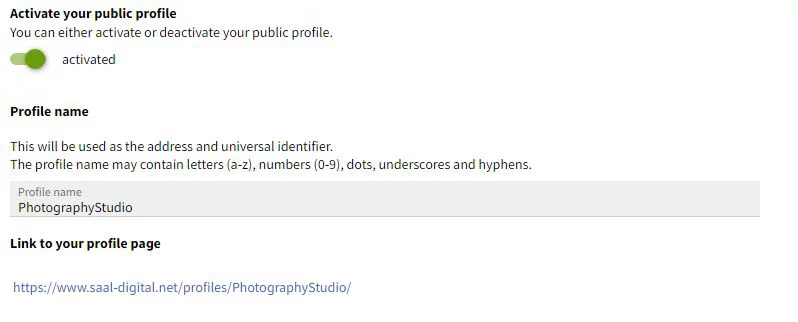
First, you will need to enable the Activate your public profile option to begin creating your profile page. Once activated, you will need to give your page a profile name. Once you add one, click save changes. A link will be generated.

Your page has already been created, although it is still empty. When you click on it, you will see that a new window will open with your blank web page. You need to add the information you want to appear on your profile page. Please note that this link will not work if the Activate your public profile option is disabled.

Info and appearance customization
You can personalize your page by uploading your logo. Simply click on Upload Image under the section Logo and corporate design and select your logo according to the specifications provided. Your logo will appear in the top left corner of your page.
You can also upload an image for your website header. This will appear at the top of your page. You will need to click on the Upload image button under Header image section and select the image. Once uploaded, you can click on Edit image to choose the image selection that will be displayed.

You can change these images at any time by uploading another to replace them or by clicking on Delete to remove them. In addition to images, you can add your personal information and social media networks.

Under the About you section, you will find several options to fill in your personal information. To add a Title to your profile page, which will be displayed below your avatar image. An Artist name, which will be used as the author reference and responsible for the content of the site. A description that will appear below the title of the site.
Under the Social media section you will find a variety of options for including your social networks on your website. The links to your social networks will be visible at the bottom of your page with the logo of the corresponding platform. If you have an additional website that you would like to add to your profile page, you can also include it.
Finally, you have different options to customize the display mode of your website. You can even choose a specific display mode for mobile devices. And you can opt for a dark or light appearance.

Remember to click Save changes every time you enter new content. You can preview your page by clicking on the link to your profile page.

Additionally, you have the option to add your profile to Saal WallArt, the online platform where you can showcase your work, connect with potential buyers, and earn money from your photography. If you publish photos on WallArt, you can create a gallery on your profile page with the images you have uploaded there. Find out more about WallArt here.
Publish galleries to your profile page
To add galleries to your profile page, go to the Galleries menu and open the Share settings for the gallery you want to add to your profile page.
By default, the Publish on profile page option is deactivated, simply activate it, and click Save to display your gallery on your profile page. You can publish as many galleries as you like and unpublish them whenever you please by deselecting this option.

Please, note that all settings for each gallery inherit the settings already made in the Galleries menu. This means, for example, that if a gallery has the Allow ordering option activated with a specific price list in its corresponding sales settings, then images from that gallery will be available for purchase from your profile page as soon as a user enters that gallery. This is the case for all the options within the gallery, share and sales settings of each gallery. You need to be aware of this and change the gallery settings if necessary.


